Welcome to Bed Presence for ESPHome! This page contains everything you need to get started.
Bluetooth Provisioning
- If you have a Bluetooth proxy, simply connect USB-C power supply and skip to
Adding to Home Assistant.
WiFi Provisioning
- Connect USB-C power supply.
- Use phone to connect to
bed-presence-xxxxxxWiFi. - If asked to stay connected, press
Yes. - Open a web browser and navigate to
http://192.168.4.1 - Select WiFi network you would like to add the device to, and provide the password.
Adding to Home Assistant
- If you’d like full control over the firmware on the device (advanced), adopt the device into the ESPHome Dashboard.
- In Home Assistant navigate to
Settings->Devices & services. -
You should see a discovered item called
Bed Presence xxxxxx.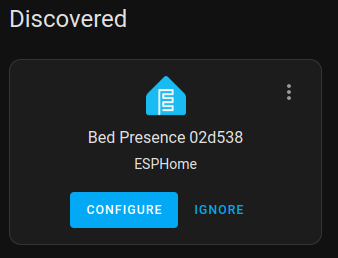
- Click
ConfigurethenSubmit. If desired, specify an area and clickFinish.
Installing Sensor on Bed
If you are installing using the Universal Mounting Kit, select between Queen/Full & Twin and King.
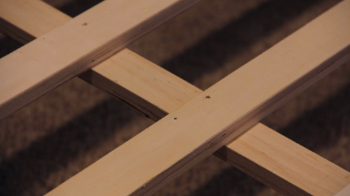
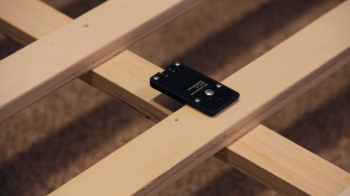
Slat Install
-
Remove mattress from bed frame.
-
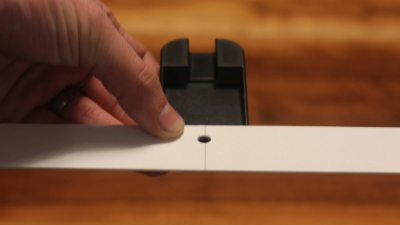
Select a bed slat in the torso region, where most of your weight will be applied to the bed (think about where you sit or lay in bed). If possible, select a bed slat that does not rock side to side.
-
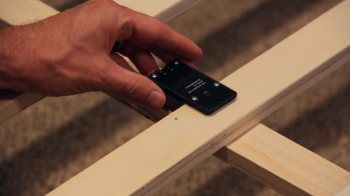
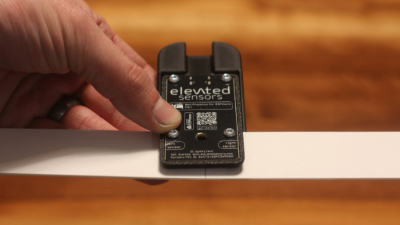
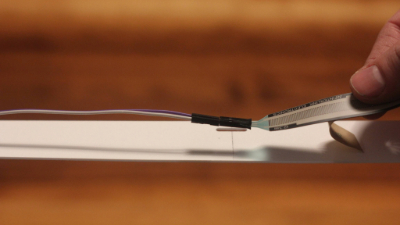
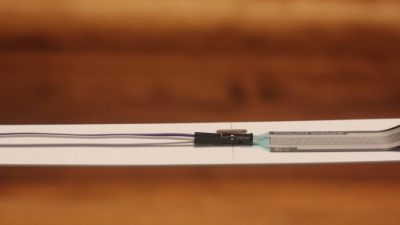
Orient the sensor with the circuit board/text facing up, and the thicker part of the device hanging over the edge of the bed slat. If the selected slat can move, you may need to screw it in place.
-
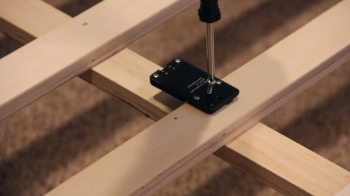
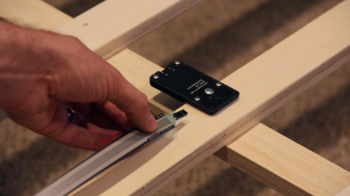
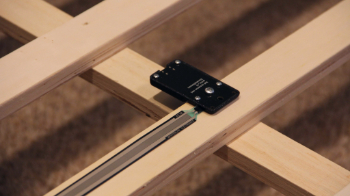
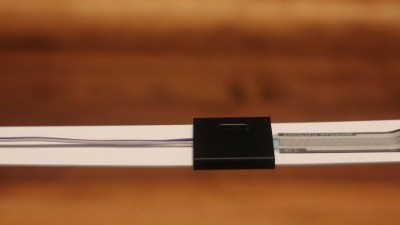
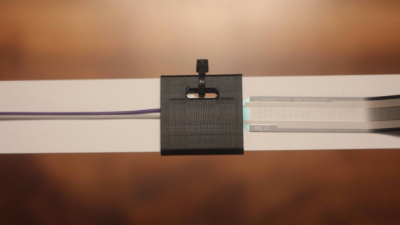
Firmly attach the device using the provided screw. Pre-drill if necessary. For metal slats, use the included double-sided mounting square (it may be easier to insert the sensor strips before applying the adhesive square).
-
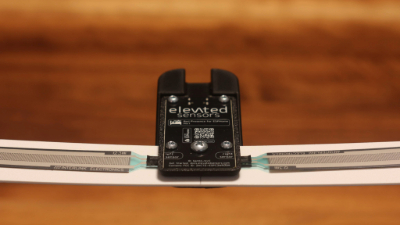
Insert the sensor strips, then peel the adhesive backing and affix the sensors to the bed slat. For a temporary setup, sensors may be gently taped in place around bed slat. Do not cover end of sensors with tape, as there is a required vent opening. For King beds, consider using the included extension wires to space the sensors futher apart. Zip ties can be used to hold everything neatly in place.

-
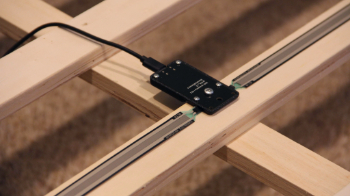
Connect USB-C power.
-
Carefully place the mattress back in place. This may require 2 people, as dragging the mattress across the sensors may dislodge them.
Queen/Full & Twin Mounting Kit Install
- Remove the flexible slat from the packaging and lay it on a flat surface such as a carpet.
-
Align the main unit cradle under the center hole of the slat.
-
Place the main unit into the cradle and loosely attach it using the blunt-tip screw.
- Insert the sensor strips into the slots labeled “Left Sensor” and “Right Sensor”.
- For the Twin Kit, attach the sensor to whichever side is most convenient based on your installation location.
- Fully tighten the screw until the main unit is secure and no longer moves easily.
- Do not overtighten, as this may strip the plastic.
- Peel off the adhesive backing on each sensor strip and firmly stick them down.
- Connect USB-C power. The unit is now ready to install on top of a box spring, upholstered base, solid platform, or foundation.
- For beds with wooden slats or platforms, optionally use the provided wood screws to secure the ends of the flexible slat in place.
King Mounting Kit Install
- Remove the flexible slat from the packaging and lay it on a flat surface such as a carpet.
-
Align the main unit cradle under the center hole of the slat.
-
Place the main unit into the cradle and loosely attach it using the blunt-tip screw.
-
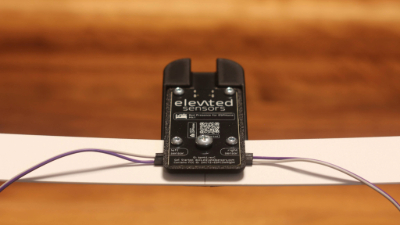
Insert the sensor extension wires into the slots labeled “Left Sensor” and “Right Sensor”.
- Fully tighten the screw until the main unit is secure and no longer moves easily.
- Do not overtighten, as this may strip the plastic.
-
Connect the sensor strips to the ends of the extension wires.
- Fully extend the extension wires, then peel off the adhesive backing on each sensor strip and firmly stick them down.
- Ensure the sensor strips are approximately centered top to bottom.
- Gently install the sensor extension clips, inserting the thin side under the slat.
- Extension wire/sensor strip connector should be approximately centered in the clip.
- The connectors should click into a cavity, leaving the clips flush with the slat.
- It’s okay if the slot in the slat does not perfectly align with the slot in the clip.
-
Insert the included zip tie through the slot, tighten it, and trim excess.
- Connect USB-C power. The unit is now ready to install on top of a box spring, upholstered base, solid platform, or foundation.
- For beds with wooden slats or platforms, optionally use the provided wood screws to secure the ends of the flexible slat in place.
Automatic Sensor Calibration
The calibration process requires you to get into and our of your bed. It records the sensor readings while the bed is both occupied and unoccupied and automatically calculates the best trigger pressure.
- Navigate to the device under Home Assistant Devices. Find the
Configurationsection. - Have the person you are calibrating for gently lay on their side of the bed.
- Let the sensor settle for a few seconds and press
Calibrate Occupiedfor the correct side of the bed. - Get out of bed.
- Leave the entire bed unoccupied for a couple minutes, then press
Calibrate Unoccupiedfor the correct side of the bed. - Repeat for the other side of the bed.
- The goal of the automatic calibration is to get the trigger value to a good starting point. If you find that you are getting false triggers, want to increase/decrease sensitivity, etc, continue to
Manual Sensor Calibration.
Manual Sensor Calibration
- Alternatively, you can manually set the
Trigger Pressure. Viewing the graph of the sensor pressure can help guide your desired pressure. - If using only once sensor, you can set the value slightly higher than the “non occupied” pressure. If using both sensors, make sure to set it high enough that someone on the opposite side of the bed doesn’t trigger it.